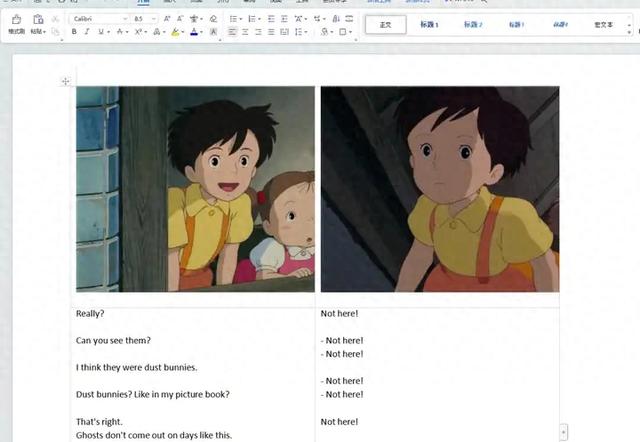
以动画龙猫为例,先对视频进行截图,参见文章《AI办公自动化:根据字幕时间轴批量对视频进行截图》;
然后拆分srt文档,参见文章《AI办公自动化:根据字幕时间轴批量拆分srt文档》。
这两步完成之后,在ChatGPT中输入提示词:
你是一个Python编程专家,要完成一个Python脚本编写任务,具体步骤如下:
打开文件夹:"D:\My.Neighbor.Totoro.1988.720p.BluRay.X264-AMIABLE [PublicHD];
新建一个word文档:龙猫台词本.docx;
设置页边距为:上:1厘米,下1厘米,左3厘米,右1厘米;
word文档页面设置的方向为:横向;
第1页插入一个2行2列的表格,设置表格边框为:无;
设置表格第1行第1列单元格的长度为13.16厘米,高度为6.88厘米;
设置表格第2行第1列单元格的长度为13.16厘米,高度为11.89厘米;
在表格第1行第1列单元格插入文件夹“D:\My.Neighbor.Totoro.1988.720p.BluRay.X264-AMIABLE [PublicHD]\Subs”中的图片:{picnumber1}.jpg;({picnumber1}的值从8开始,以30递增,直到61、08结束),设置图片的长度为12.43厘米,宽度为6.42厘米;
在表格第1行第2列单元格插入文件夹“D:\My.Neighbor.Totoro.1988.720p.BluRay.X264-AMIABLE [PublicHD]\Subs”中的文本:{txtnumber1}.txt;({txtnumber1}的值从8开始,以30递增,直到608结束),字体设置为:calibri 正文、字号为:小四;
设置表格第1行第2列单元格的长度为13.16厘米,高度为6.88厘米;
设置表格第2行第2列单元格的长度为13.16厘米,高度为11.89厘米;
在表格第1行第2列单元格插入文件夹“D:\My.Neighbor.Totoro.1988.720p.BluRay.X264-AMIABLE [PublicHD]\Subs”中的图片:{picnumber2}.jpg;({picnumber2}的值从23开始,以30递增,直到608结束),设置图片的长度为12.43厘米,宽度为6.42厘米;
在表格第2行第2列单元格插入文件夹“D:\My.Neighbor.Totoro.1988.720p.BluRay.X264-AMIABLE [PublicHD]\Subs”中的文本:{txtnumber2}.txt;({txtnumber2}的值从23开始,以30递增,直到608结束),字体设置为:calibri 正文、字号为:小四;;
第1页word文档生成完成,接下来循环执行继续自动生成其它页的word文档内容,直到21页word文档内容全部完成;
注意:每一步都要输出信息到屏幕
要导入WD_ORIENTATION
在python-docx中,我们不能使用add_section方法来添加新的部分(section)
在 python-docx 的版本中,WD_BORDER 已经被移除了。我们可以通过更改表格的边框样式来实现无边框效果
chatgpt生成的代码:
import os
from docx import Document
from docx.shared import Cm
from docx.enum.section import WD_ORIENTATION
# 打开文件夹
folder_path = r"D:\My.Neighbor.Totoro.1988.720p.BluRay.X264-AMIABLE [PublicHD]\Subs"
# 新建一个Word文档
doc = Document()
# 设置页面横向
section = doc.sections[0]
section.orientation = WD_ORIENTATION.LANDSCAPE
print("页面方向设置完成")
# 定义初始的图片、文本编号
pic_number1 = 8
txt_number1 = 8
pic_number2 = 23
txt_number2 = 23
# 循环生成21页的Word文档内容
for page_num in range(1, 22):
# 添加新的页面
doc.add_page_break()
# 添加第page_num页的内容
table = doc.add_table(rows=2, cols=2)
table.autofit = False
table.cell(0, 0).width = Cm(13.16)
table.cell(1, 0).width = Cm(13.16)
table.cell(0, 1).width = Cm(13.16)
table.cell(1, 1).width = Cm(13.16)
table.rows[0].height = Cm(6.88)
table.rows[1].height = Cm(11.89)
# 设置表格边框为无边框
for row in table.rows:
for cell in row.cells:
for paragraph in cell.paragraphs:
for run in paragraph.runs:
run.font.size = Cm(0.3)
cell.border = False
print(f"第{page_num}页表格创建完成")
# 在第page_num页表格中插入内容
pic_path1 = os.path.join(folder_path, f"{pic_number1}.jpg")
if os.path.exists(pic_path1):
cell = table.cell(0, 0)
run = cell.paragraphs[0].add_run()
run.add_picture(pic_path1, width=Cm(12.43), height=Cm(6.42))
txt_path1 = os.path.join(folder_path, f"{txt_number1}.txt")
if os.path.exists(txt_path1):
with open(txt_path1, 'r', encoding='utf-8') as txt_file:
txt_content = txt_file.read()
cell = table.cell(1, 0)
cell.text = txt_content
cell.paragraphs[0].style.font.name = 'Calibri'
cell.paragraphs[0].style.font.size = Cm(0.3)
pic_path2 = os.path.join(folder_path, f"{pic_number2}.jpg")
if os.path.exists(pic_path2):
cell = table.cell(0, 1)
run = cell.paragraphs[0].add_run()
run.add_picture(pic_path2, width=Cm(12.43), height=Cm(6.42))
txt_path2 = os.path.join(folder_path, f"{txt_number2}.txt")
if os.path.exists(txt_path2):
with open(txt_path2, 'r', encoding='utf-8') as txt_file:
txt_content = txt_file.read()
cell = table.cell(1, 1)
cell.text = txt_content
cell.paragraphs[0].style.font.name = 'Calibri'
cell.paragraphs[0].style.font.size = Cm(0.3)
# 更新图片和文本编号
pic_number1 += 30
txt_number1 += 30
pic_number2 += 30
txt_number2 += 30
print("全部页word文档生成完成")
# 保存文档
doc.save("龙猫台词本.docx")
print("文档保存完成")
